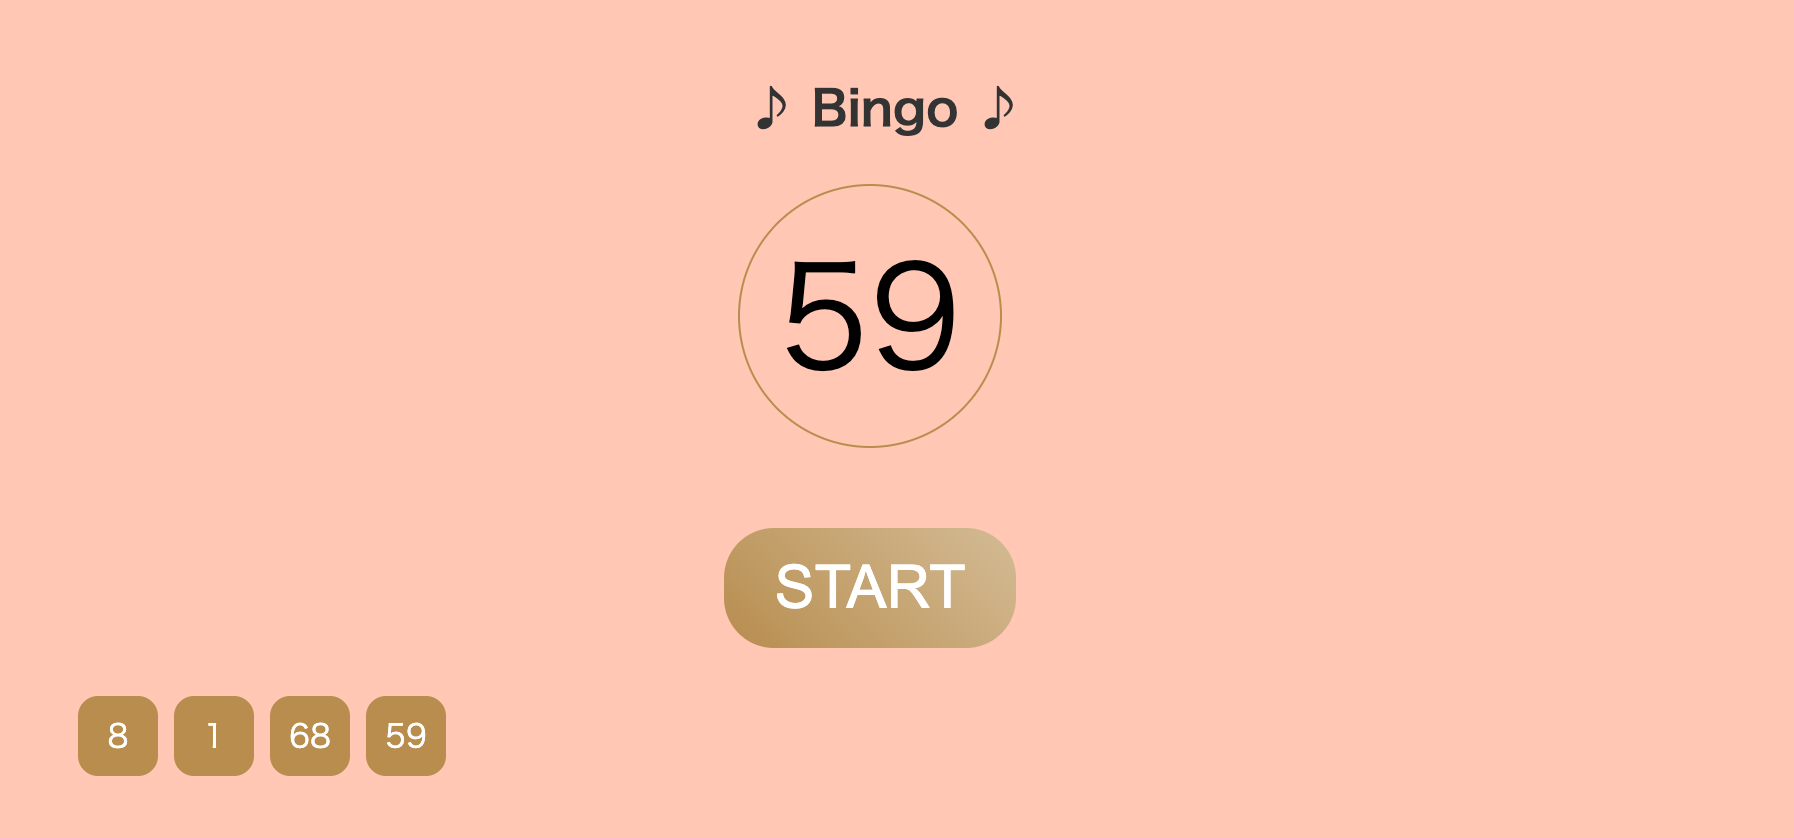
ビンゴ
目標#
ビンゴの時につかえるスロットマシンを作ろう!
サンプルコード#
今回は、ビンゴは別ページに作成します。これまで作成したメインのページには、ビンゴページに行くボタンをつけましょう!
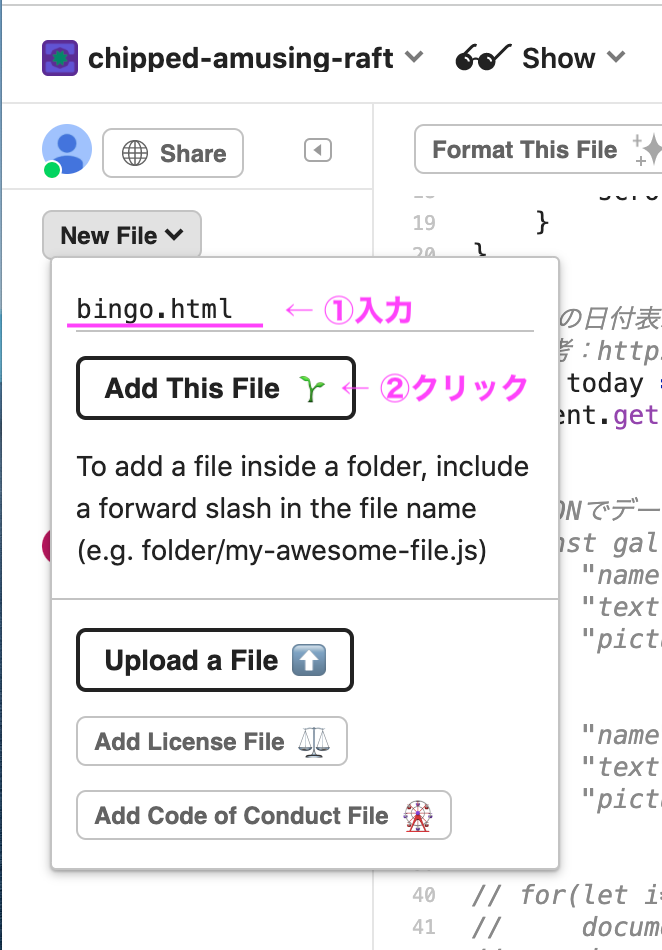
1.Glitchで、bingo.htmlという名前で新しいHTMLファイルを作成しよう!#
左上の「New File」をクリックする
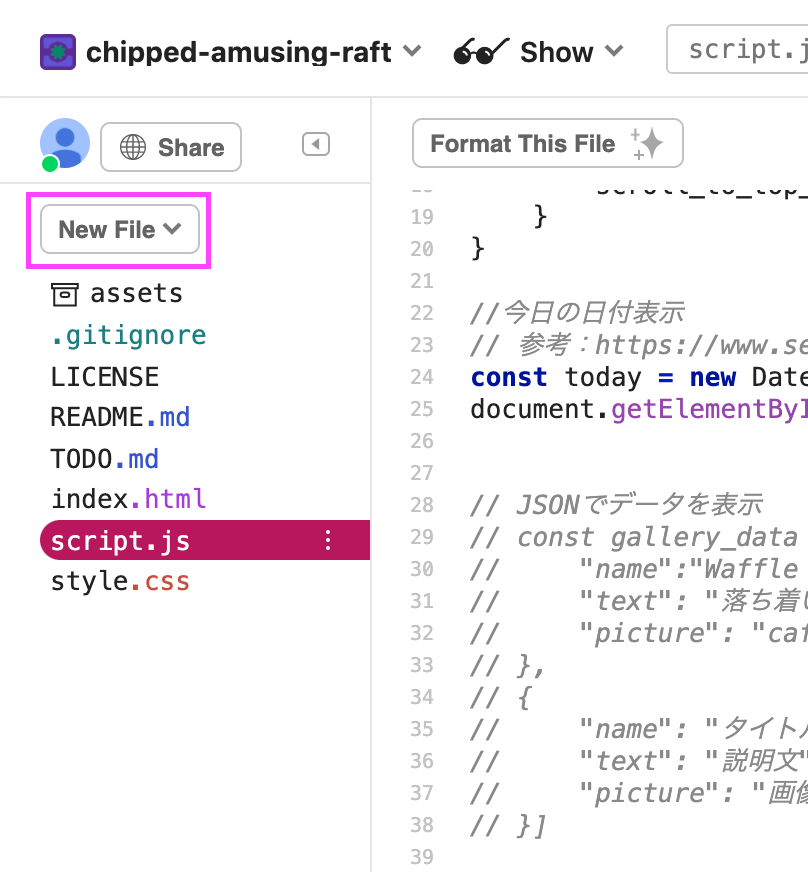
bingo.htmlという名前を入力し、「Add This File」でファイルを作成する
2.HTMLのコードを、Glitchの index.html に追加しよう!#
<!DOCTYPE html><html lang="ja">    <head>        <meta charset="utf-8" />        <title>bingo</title>        <link rel="stylesheet" href="./style.css" />        <script src="script.js" defer></script>    </head>
    <body>        <div class="main-container">            <a class="btn" href="./index.html">Homeに戻る</a>            <h2>♪ Bingo ♪</h2>            <!-- ビンゴ -->            <div class="bingo-wrapper">                <div id="result" class="result centering"></div>                <div class="wrapper-button">                    <button id="button" class="button">START</button>                </div>                <ul id="number" class="number"></ul>            </div>        </div>
        <script            src="https://code.jquery.com/jquery-3.6.0.min.js"            integrity="sha256-/xUj+3OJU5yExlq6GSYGSHk7tPXikynS7ogEvDej/m4="            crossorigin="anonymous"        ></script>    </body></html>
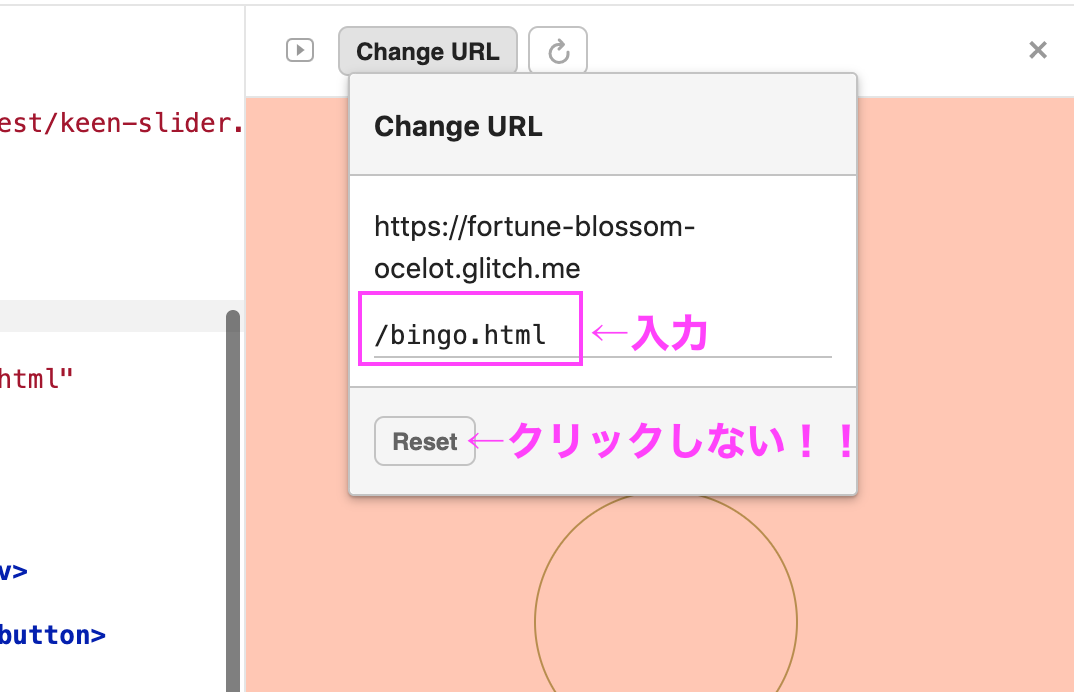
< Glitchで bingo.htmlの確認方法 >
画面右側の「change URL」をクリック
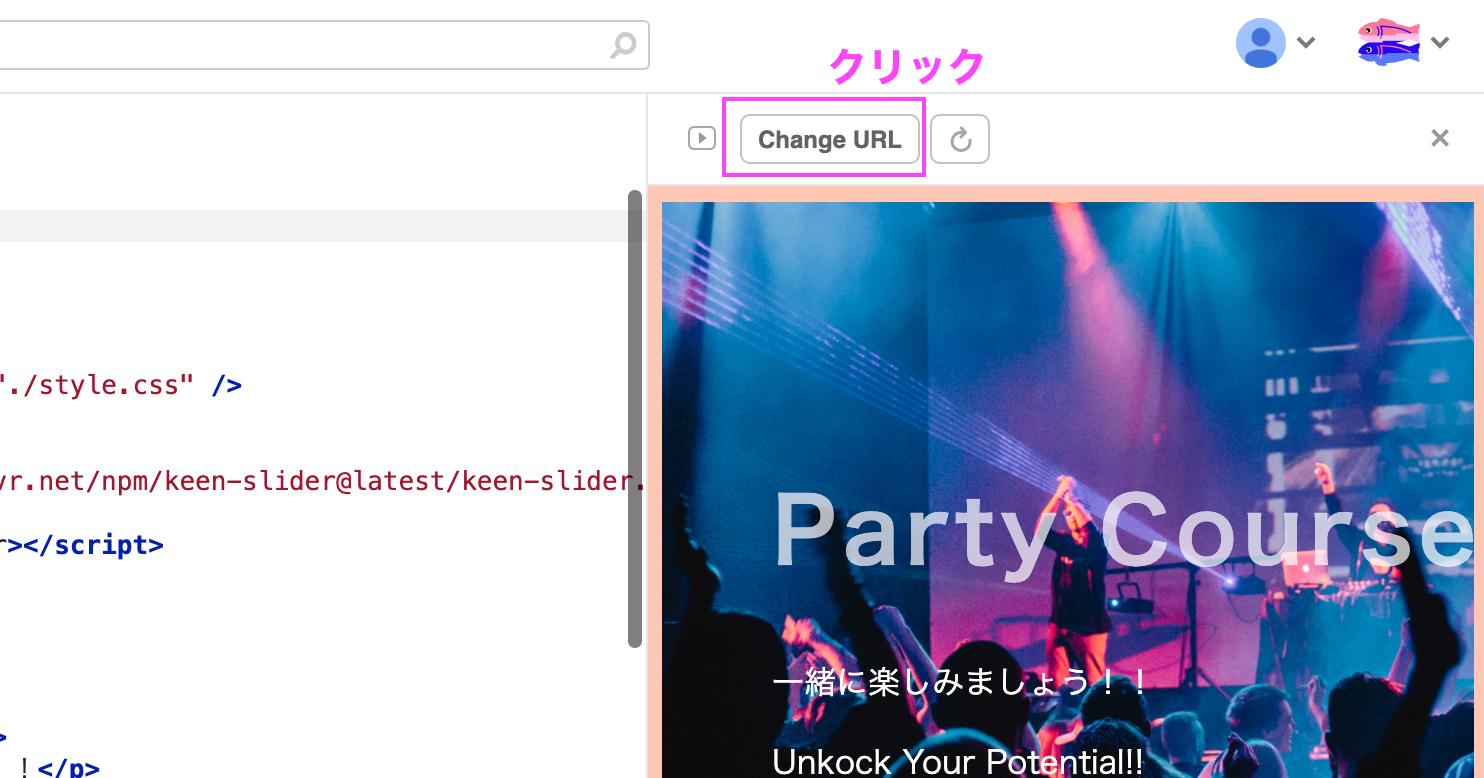
bingo.html と入力。数秒待つといつもindex.htmlのウェブサイトが表示されている場所に bingo.htmlが表示されます。。 下のボタンは リセットボタン なので押さない (index.html に戻したいときは、Resetボタンを押しましょう!)
3.CSSのコードを、Glitchの style.css に追加しよう!#
/* ビンゴ */.bingo-wrapper {    margin: 0 auto;    text-align: center;}
.centering {    display: flex;    justify-content: center;    align-items: center;    margin: 0 auto;}
/* ルーレット */.result {    border: solid 1px #b78d4a;    border-radius: 50%;    font-size: 70px;
    margin-bottom: 20px;    width: 130px;    height: 130px;}
/* 出た数字の一覧 */.number {    color: #b78d4a;    display: flex;    flex-wrap: wrap;    justify-content: flex-start;    margin: 0 auto;    list-style: none;    width: 80%;    padding: 0;}
.number li {    background-color: #b78d4a;    color: #ffffff;    border-radius: 10px;    height: 40px;    margin: 4px;    width: 40px;}
/* ボタン */.wrapper-button {    padding: 20px 0;}
.button {    font-size: 30px;    display: inline-block;    padding: 0.8rem 1.6rem;    border: none;    border-radius: 25px;    color: #ffffff;    background-image: linear-gradient(45deg, #b78d4a 0%, #d4bb92 100%);}
.button:hover {    background-image: linear-gradient(45deg, #d4bb92 0%, #fde0a5 100%);}
3.JavaScriptのコードを、Glitchの script.js に追加しよう!#
$(function () {    // 1~75まで、bingoの数字一覧を作成    let max = 75    let bingo = []    for (let i = 1; i <= max; i++) {        bingo.push(i)    }
    let timer    let random    // START・STOPボタンクリックのイベント    $("#button").on("click", function () {        // START        if ($(this).text() == "START") {            // ボタンのテキストを"STOP"に変更            $(this).text("STOP")
            // ルーレットタイマーを設定            timer = setInterval(function () {                random = Math.floor(Math.random() * bingo.length)                $("#result").text(bingo[random])            }, 10)            // STOP        } else {            // ボタンのテキストを"START"に変更            $(this).text("START")
            // ルーレットタイマーを停止            clearInterval(timer)
            // 停止時の数字を結果に反映            let result = bingo[random]            // 一覧から削除(次のルーレットに表示させないため)            bingo.splice(random, 1)
// 数字一覧に追加 $("#number").append($("<li>").text(result)) $("#number li").addClass("centering") } })})ここまででビンゴページが完成です!!
4.自分のウェブサイトからbingoページに移動するボタンを作成しよう!#
index.htmlを開いてね

このコードを、ボタンを表示したい位置に追加しよう!
<a class="btn" href="./bingo.html">Bingoを始めよう!</a>href="./bingo.html"という部分は、bingo.html というファイルにリンクをつける、という意味です。